
Tags
bum pad, chemise a la reine, chemise gown, false rump, linen, pockets, shift, undergarments, underpinnings
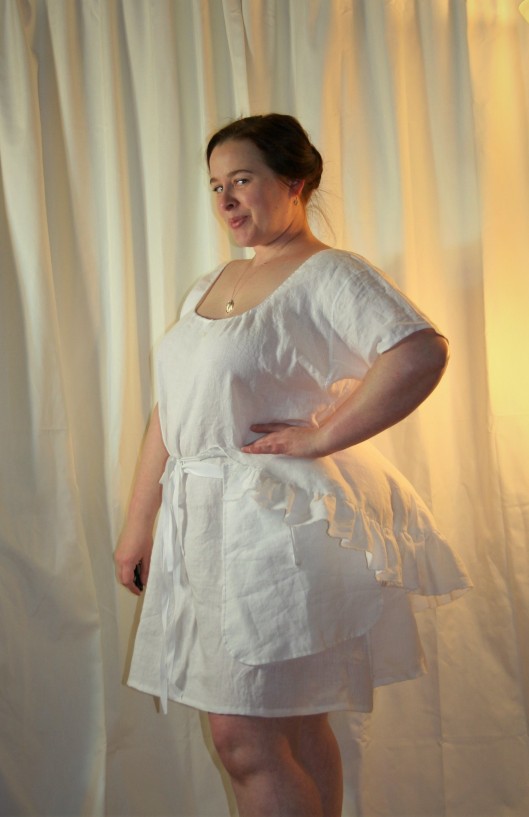
I finished my 18th century linens! Shift, pockets, and bum pad.
Because I like to procrastinate while I gather more information than I could ever possibly use for a project so that I feel like an informed person before I start, I decided to hold off on mocking up the 1790s stays. I jumped right into making the other undergarments and accessories instead. I finished them last week, and I’m pretty satisfied with how they turned out.
Pockets
First sewn were the pockets. They are plain white, medium-weight linen with white cotton twill tape bindings and waist tie; no embroidery. I could say that I omitted embroidery because the pockets will go under a light-colored outfit, and I didn’t want any chance of show-through, but really it’s because I’m lazy and embroidery is something I haven’t advanced in much. I based the shape and size off the 18th century pockets in Put on They Beautiful Garments by Meredith Wright (which in a newer edition seems to be titled Everyday Dress of Rural America: 1783-1800). They’re a little shorter, but about the same width as the ones in the book. I made a pattern, because if I ever want to make more pockets, there it will be; no measuring and counting a second time. The pockets are completely hand-sewn. I couldn’t find any details on how to create the channels for the waist tie. I’m not sure whether the top of the pockets was supposed to be turned to create a channel or what, so I used some decorative twill tape applied to the upper edge on their back sides to make channels instead. The pockets took a couple hours to make.
Bum Pad/False Rump
Next came the bum pad or false rump. This was easier than I anticipated and really quite fun! I drew inspiration for the shape from Sanna of Rococco Atelier, Ginger of Scene in the Past, and Kendra’s article for Foundations Revealed, as well as the satirical print The Bum Shop. Following Sanna’s reasoning of softening the pad’s edge under skirts, I added a ruffle to the edge of mine, too. I don’t think this is strictly historically accurate; at least there’s no extant garment or illustration that I have seen showing such a thing on a bum pad, although in the bum pad style experiment that Kendra Van Cleve wrote about, she included a mini-petticoat on one version of this style of bum pad, reproducing a style shown in the satirical print.
My bum pad is made from medium-weight white linen, has twill tape ties, and is stuffed with a bamboo rayon/poly fiberfill. It’s a crescent shape topstitched from edge to edge to create sections (so it looks like a croissant), and each section is stuffed individually. I didn’t stuff it too firmly. My rump and hips are quite ample, and I’m going for a gentle roundness in my skirts, not an overly-voluminous rump like those shown in The Bum Shop. Stuffing it more firmly would create the 18th century equivalent of a “badonkadonk” and I don’t want that. So, we’ll see how it shapes the skirts once I’ve made the petticoats. If more volume is needed, the outer seam is hand-sewn with an easy-to-remove running stitch; I’ll just free that seam and stuff the sections more. This was a very easy project, and took maybe 3 hours total to finish.
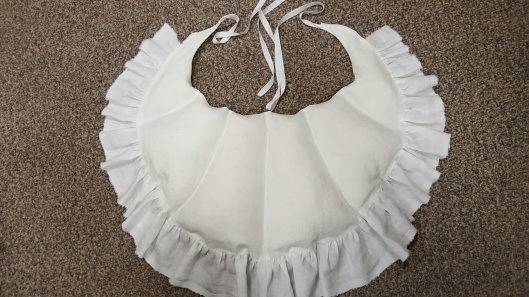
I used a wide, tapered strip of linen with the selvage edge as the ruffle edge so I didn’t have to finish it. Shortcuts for the win!
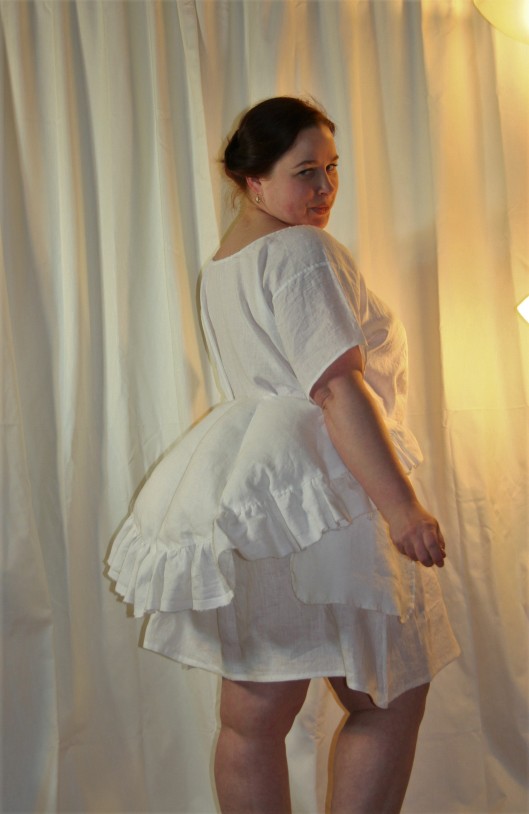
Perfectly genteel 18th century floofy rump? Or full-on 18th century Badonkadonk? You decide.
Shift
The shift is made from soft-white handkerchief linen. It is based on the 1790s shift in Put on Thy Beautiful Garments although I widened the shoulders and body by 2 inches front and back, because I’m a larger size than the original owner of the shift in the book. I enlarged the sleeves by 1 inch, as well, to accommodate my full biceps.
This is the first project I’ve ever done where any of the garment plans have come from book diagrams, strangely. Again, I made a paper pattern based on the shift diagram in the book so that when I make another one I won’t have to recount squares and measure out shapes on the fabric. Because our modern fabric is wider, I did not cut separate gores and sew them as they were on the original; the gores are built into the pattern, which I cut on the fold and as a single long front/back piece with no shoulder seam, just as in the book.
It went together beautifully and so easily. The base seams are machine-sewn, but then hand flat-felled with the felling on the right side so that when worn under stays, the seams won’t press into my flesh and be uncomfortable. The hems are hand-sewn, too. The neckline tie is a very narrow twisted cord of white and beige poly/cotton from JoAnn.
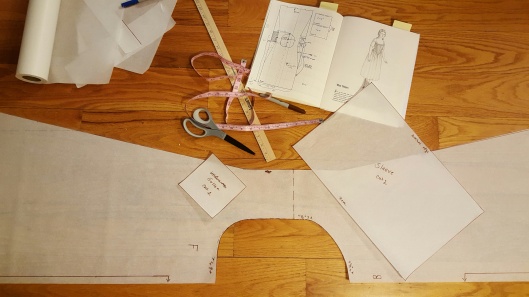
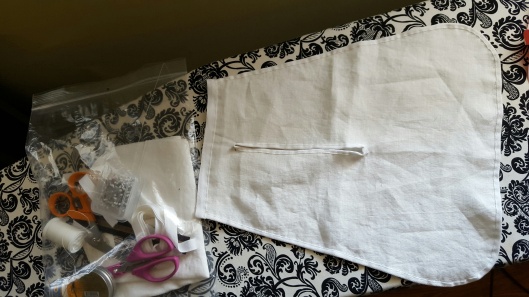
My shift pattern, taken from Put on Thy Beautiful Garments.
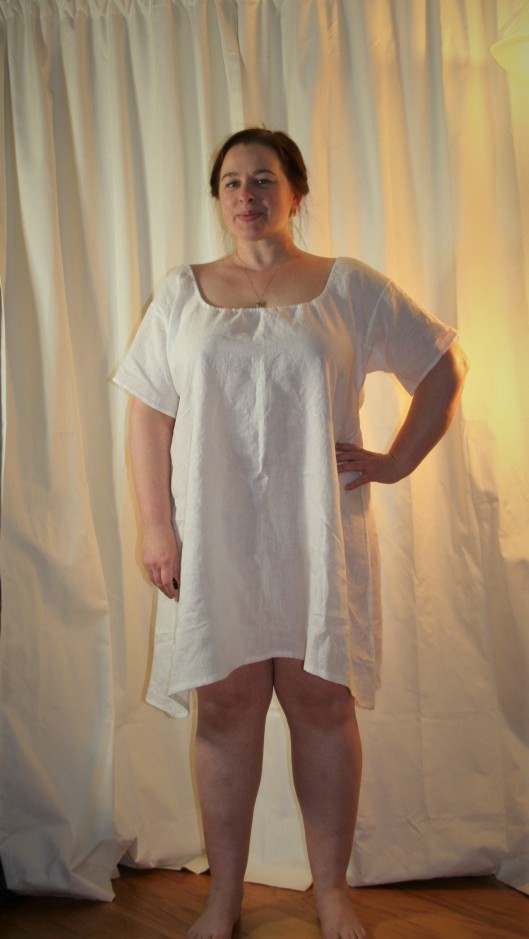
Handkerchief linen shift. It could be longer at center front, but once my stays are on, the bust will be squashed and won’t pull up the shift at the hem anymore.
Drawers
Now, I also made and will wear with the whole ensemble a pair of 19th century open drawers, which I use for all my Regency-era dress-up. These, of course, would not have been available to women (at least from all I’ve read) during the 1780s/90s when the chemise a la Reine was popular. But … I make concessions in historical accuracy for my personal comfort. I have thick thighs and they chafe, and it can get painful when a lot of walking is happening. Drawers prevent chafing while still allowing easy access for trips to the bathroom. No one will know they’re under the three skirt layers and shift except me.
Seriously, what did ladies of “full habit” do about thigh-chafing in period? I want to know. Stockings? They don’t go that high. Some kind of thigh-swaddling wrapping? A lotion? I imagine even if those options were available, they were just as effective as the same options are today: that is, not very.
I won’t show you my drawers, since they’re not historically accurate for the whole ensemble. But they’re made from a lighter-weight hanky linen, almost a gauze; have an attached waistband (so they don’t rotate during use); and tie in the front. They are undecorated.
Next up!
Now that those undergarments and accessories are complete, it’s really time to start on the stays. I have just a bit over 1 month to complete the stays, two petticoats, and the gown. I’m not too worried about the last three, but I’ve never made 1700s stays before, and I’ve never worked with a scaled-up and enlarged stay pattern before. The cardboard mockup and the first fabric mock-up were close. The pattern did need some adjustments because I graded up too much, I think. And now I’m ready for the second fabric mockup with boning.
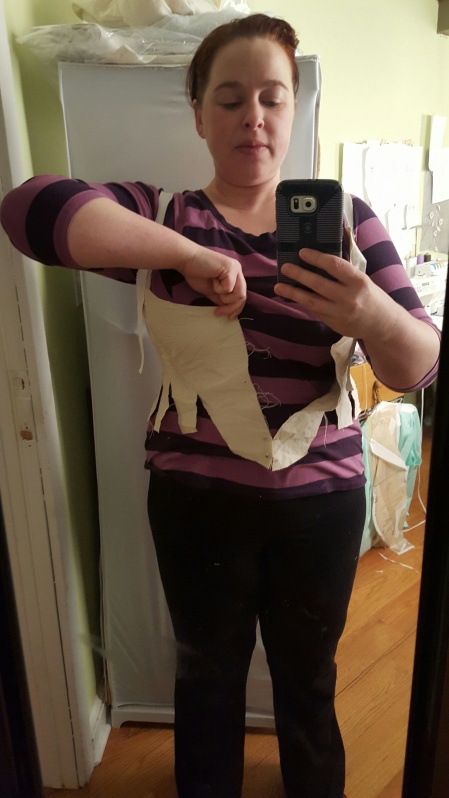
Here’s a shot of my first stays mockup. No boning at this point. Just to test the shape and general size. A little reshaping of the front and side panels needed at this point for a closer fit, but all in all, not a bad starting point!
I’ll be making the stays from 2 heavy linen canvas outer layers, cotton duck inner layer, and a medium-weight lining layer. The boning will be German plastic, and I’ve ordered 3 widths, because I’m not sure yet which will be best: 11 mm, 7 mm, or 5 mm. I just wish it came in something smaller than 27-yard spools, because DANG that’s a chunk of change. However, as I work my way backward through the 18th century, I will be making more stays, so the boning will get used.
Here we go!
