Wow, I can’t believe it’s been so long since I’ve updated this blog! [I feel like I always say that–but it’s always true.] I mean–I can really believe it; I haven’t been near the blog in months (and months and months). But that’s due to my busy schedule of full-time work, freelancing (I’m still writing occasional articles and blog posts for Threads magazine, where I used to work), and sewing–plus lots of travel and family-filled weekends, and the necessary downtime for recuperation. I truly envy people who can go 100 mph at all cylinders 24/7/365–but that ain’t me. Never has been. I get tired, and I need to recover. And getting on the computer after a full day of staring at my work computer and editing, enhancing my eye strain, just isn’t in the cards most days. And then there are the days when I’m actually sewing instead of writing about sewing. But I’m not abandoning this blog. Just neglecting it.
So now that I’m done with my semi-annual “I suck at blogging” non-apology, let’s get down to business. I have been sewing! A lot, actually. Both historical and real-life stuff. And I happen to have both the brain space and the time to type up something. So here goes!
***********************
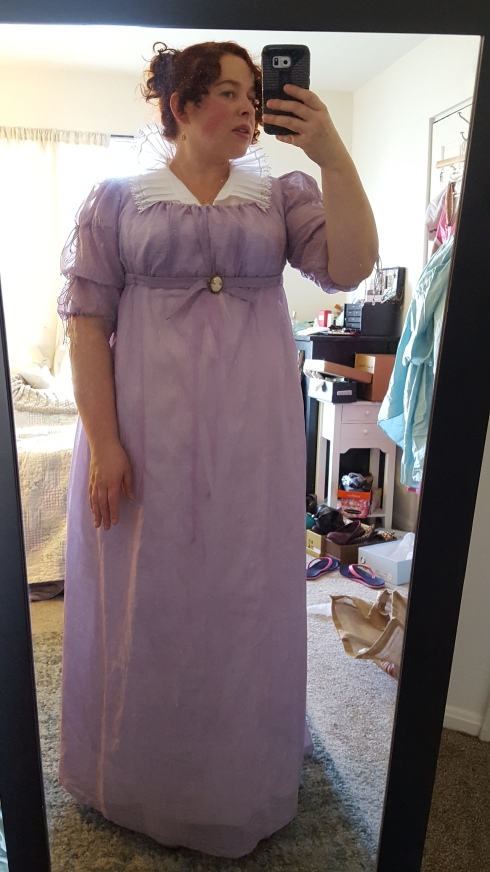
My first post in a long while is on my newest project. I’m dubbing it the Sunset Sari Dancing Dress. It’s a Regency ballgown made from a sari pulled from my collection. I’ve been wanting to use one of my saris for a long time, since I’ve been collecting them for a few years now. They make such wonderful Regency-era gowns and I’ve seen many fabulous renditions around the blogosphere and in real life.
Now, there is no evidence–none–that women during the extended Regency actually used imported saris as material for gowns. Kashmiri shawls were imported and were the height of fashion for many years, and there is ample evidence that they sometimes were used as material for European gowns, and even that some textiles were woven to imitate the motifs used on the shawls. We can see this in fashion plates, in portraits, and even in a few extant gowns in museum collections. But despite the appearance in fashion plates of gowns made from fabrics and trims/embroidery resembling those used in modern-day saris, there is no indication, to my knowledge, that they were. Gowns were commonly trimmed and embroidered, and fabrics often had woven designs, and these embellishments were often linear in design, as were many of the embroideries used on gowns early in the Regency.
However, saris lend themselves so well to use as gown material and trimmings for the Regency era! Each sari provides 5 to 6 yards of usable fabric and trim in a decent width. It’s easy to imagine that a sari could have been used for a gown. I would love to seen an exhibition of Indian saris from the 1790s through 1820. For those of us casual* historical costumers who don’t have the time, funds, skill, or the interest–all valid reasons–to do extensive embroidery, a sari is an acceptable shortcut!
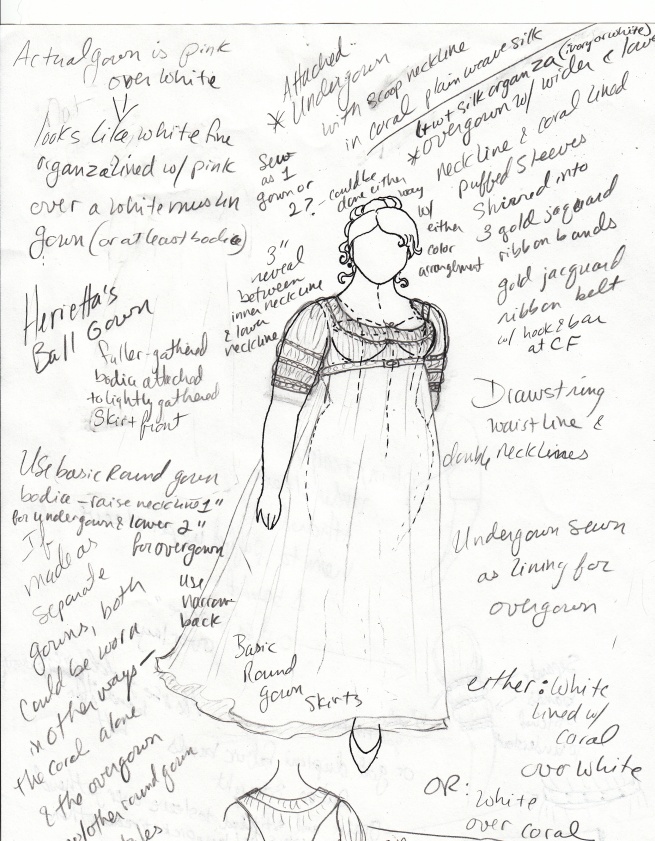
The first step was to pick one sari from the dozen or so in my collection. Since it was to be a ballgown, it needed to be formal in design of a finer material. That left the few cotton ones out; the rest are silk–some very thin and drapey, but a few of a stiffer weave, similar to organza in drape and hand but more opaque (what might be called “tissue”). I settled on this pink, purple, and gold sari–gorgeous sunset colors. The borders and pallu are woven in a variety of medallion motifs and a floral motif I haven’t seen before: they look a little like lotus blossoms or perhaps fresias. The next step was to figure out how I wanted to use the pallu as part of the gown’s design. This is where my Regency croquis is really helpful! Here’s what I settled on after a few variations:

Here’s the design from the front.

And the design from the back. Ultimately I used more of the pallu for the side back and shoulder pieces, as well.
I decided to use the full width of the sari without cutting off one of the borders. I could have cut it off the edge used for the waist and reattached it below the other border to create a deeper border on the hem, but I actually like the detail around the waist. I think it works because the border design isn’t only hard lines, like some saris have; it’s got the one ribbon-like strip along the edge of the border but also the more free-form floral motifs.
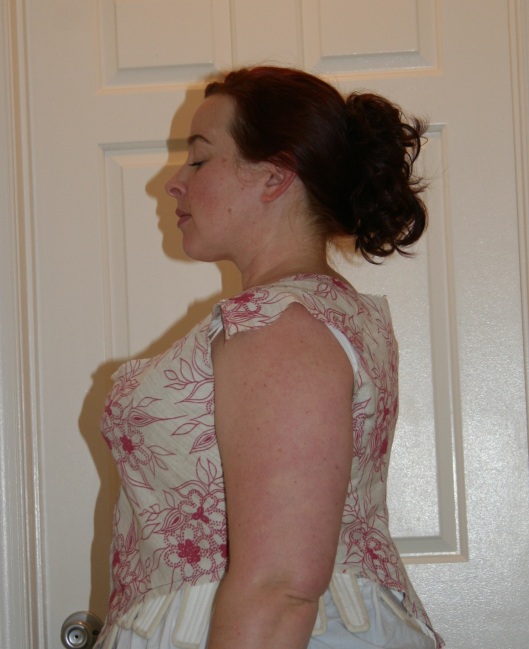
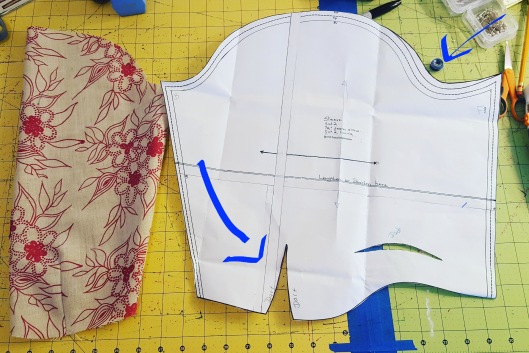
The pattern is one I developed for a ballgown made about three years ago (my gold-spotted ivory, which I still have not blogged about). To create a gathered sweetheart effect on the bodice, I approached my base pattern (my block) as I would any modern pattern. This is NOT how this effect was created in the period. And I’m okay with that! Essentially, I gave my block a cowl-neck treatment! To do this, you slash and spread the pattern at center front, tilting the pattern’s neckline up a few inches (which sort of squishes the armscyes, but since the armscye length doesn’t change, just the shape a bit, they still work just fine with the sleeves). Here’s what the pattern looks like:

With a drapier fabric, the cowl would droop in soft folds over the bust, which would be pretty and I may use it that way at some point. But for the sweetheart effect, either gathers or pleats down the center-front are needed to pinch the neckline down, plus gathers or pleats across the collarbone area, beneath the shoulders. On the original gown I made this patter for, I simply hand-gathered these areas and tacked some gold ribbon and pretty buttons on top. But for this gown, I knew I wanted to use bits of the sari’s border as a sort of tab at center front and at the shoulders and sleeves, on top of the gathers/pleats.
The sleeves, shoulder pieces, and bodice center backs and side backs are cut from the pallu, while the bodice front is cut with the neckline edge placed along the sari’s border to take advantage of the floral motifs as decoration. I played around a bit with the border’s placement for cutting the pattern to decide how much of the border should be incorporated–just the floral motifs or some of the linear border as well.

Less border?

Or more border?
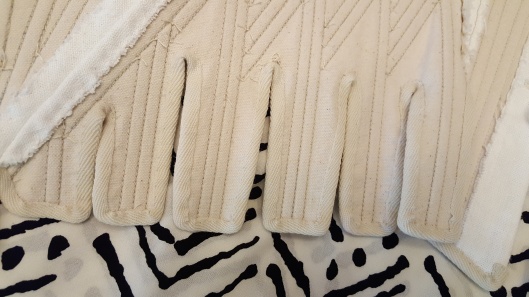
The sleeve pattern is another one I developed three or four years ago, inspired by Circassian sleeves of the period. These were generally short or mid-bicep-length sleeves that were caught up at the hems with a tab, ties, buttons or brooches so that the hem appeared scalloped and the sleeve had soft gathers. I adapted my short sleeve block for fewer gathers and a scalloped hem. I haven’t taken a photo of this pattern, unfortunately, but here’s a photo of the cut sleeve. (This could have worked just as well with a sleeve that has a straight hem, but I wanted to exaggerate the effect.)

You can see from the croquis design that I wanted deep inverted pleats in the skirt waist at center front, which I’ve seen in a few portraits and fashion plates from the period. It is surprisingly flattering and adds some beautiful movement and detail to the skirt front.
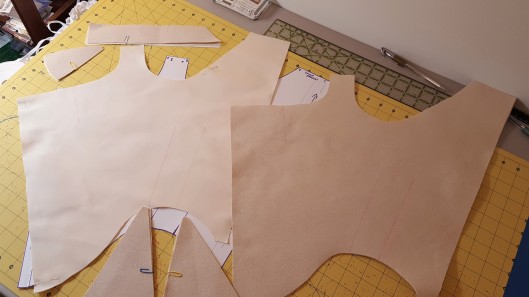
So to get started, here’s a bit of the gown construction …

All the cut pieces …
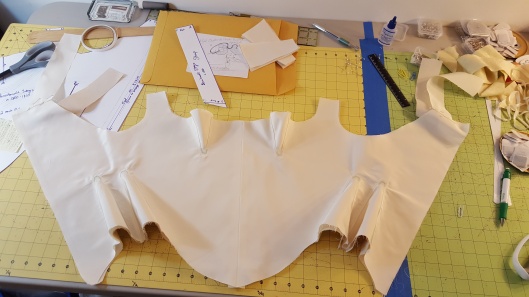
Lined in linen for support and to protect the outer fabric from sweat (I sweat a lot in the ballroom!).

The side-back curved seam allowance is turned under and lapped atop the center-back piece’s seamline and topstitched in place; I used a backstitch (a rather uneven one).


The gown closes at center back with two drawstrings, one in the back neckline. The drawstring (a narrow petersham ribbon) is secured in the back shoulder seam. The other drawstring encircles the entire waist.

Back edge turned under and whipped to the lining.

Tucks in the bodice center front to shape the neckline.

A section of the sari border is backed with a petersham ribbon to stabilize it.

Right side of the border section used to decorate the bodice center front, stitched to a petersham for strength.

Testing the effect.

Pinning, steam-pressing, and basting the bodice tucks on my tailor’s ham.

The border applied as a tab to right side, then wrapped around to the wrong side and stitched in place, catching the tucks underneath so they don’t wiggle around.

Preparing to sew a narrow piece of border to cover the gathers at the collarbones.

Testing the narrow trim placement.

Making tucks in the sleeves and covering with a handy remnant of the perfect ribbon–because I couldn’t salvage enough of the narrow bits of sari border to use here. I think this works really well, though. Little cluster of gold-tone buttons adds just enough embellishment–the sleeves are pretty decorative as-is.

Sleeves attached and the bodice all ready for the skirt!


Skirt with front inverted pleats attached to the bodice!

Looooove how luscious these pleats look with the sari border as part of the design!
Well, that’s it for the construction! Now here are the finished photos:

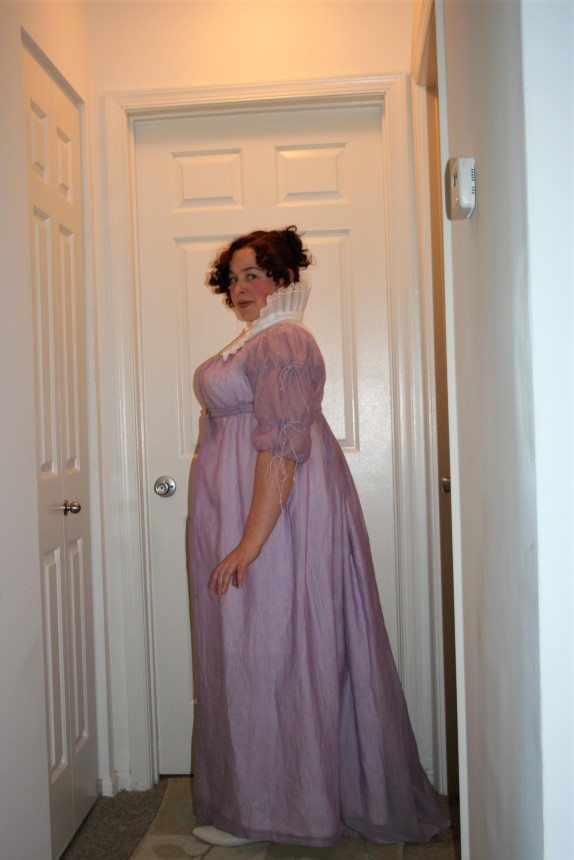
My light amethyst collet necklace (Duchessa) and matching earrings (Dames a La Mode) are a perfect complement to this gown.

Love how those front pleats fall!

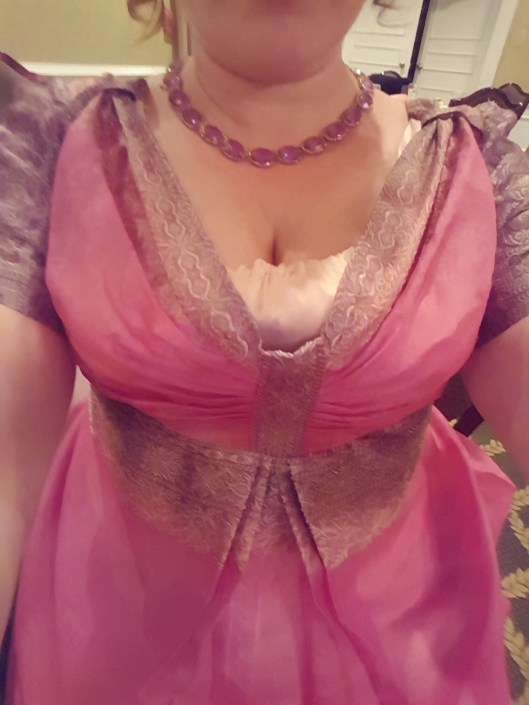
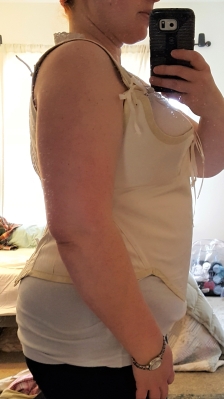
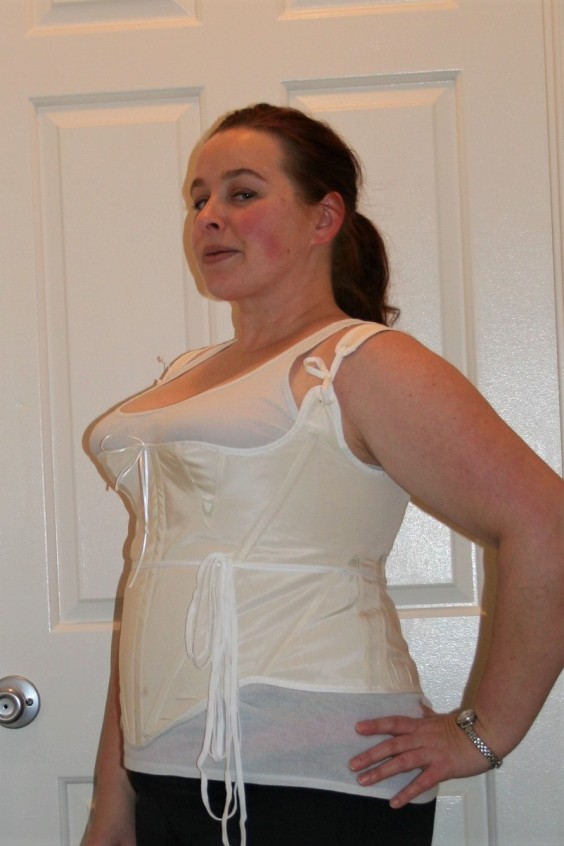
Worn over my ballet-pink silk undergown (semi-obligatory awkward boob selfie).
*I use “casual” here to mean “anyone whose first priority/goal in costuming is not 100% historical accuracy. Those of us who make historical garments because we enjoy it; who are more concerned with appearing historically accurate rather than being so. This is perfectly valid. I am not a reenactor or a historical interpreter; that’s not why I do this.


 Well, it’s been a long while since I last posted an update on anything, particularly about the last project I was working on. My 18th century project kind of ran into a wall. It’s been nearly 1 year since I set it aside and I still have to redo the side panels of the chemise a la reine! I just haven’t had the incentive to finish it. I thought I might get to it this winter and finish it in time to attend the Francaise Dinner, since I now live close enough to make attending feasible–but nope. Other projects grabbed my attention, as so often happens.