
Tags
18th Century, bum pad, chemise a la reine, chemise gown, gown, hat, Madame Oberkampf, pocket, shift, stays, Vigee le Brun
So, in the last post I promised details of the sleeve pattern changes I made for my new amethyst muslin Regency ballgown. Unfortunately, my laptop died, taking with it all the photos I had stored and processed; and they weren’t able to be recovered even by the geniuses of Geek Squad. So, until I get around to reshooting those pattern changes, that post will have to wait. Instead, some details on my newest project.
A chemise a la Reine (or robe en chemise) is a late 18th century garment that I’ve wanted to make for a while now. There’s been very little motivation to start, however, since the majority of historical costume events in my area revolve around Regency/Federal period. Plus, it’s a new century for me, so I have to start from the inside out with the correct undergarments just to get this gorgeous gown, made famous by Marie Antoinette, the Duchess of Devonshire, and portraits by artists such as Elizabeth Louise Vigée le Brun.
In fact, my motivation for wanting to start this project now is a costumed group outing of Jane Austen Society folks to visit the Met in NYC, where there is a special exhibit of Vigée le Brun paintings. With tea afterwards! And no, it doesn’t bother me that everyone else will be dressed in Jane Austen Regency.
So here I go! I’ve got my patterns, I’ve got my fabrics—nearly all from stash, luckily—I’ve got my gown inspiration and plans for adapting the pattern. Here’s a look at my inspirations, chosen fabrics, plans for the pattern, and the accessories I plan to wear to finish the look.
Gown:
As my inspiration gown, I’ve chosen the cream or off-white embroidered muslin worn by Madame Oberkampf, held by the Musée de la Toile de Jouy in France. It’s a somewhat unusual example, as it is embroidered, has slim full length sleeves, a pleated or tucked back, two drawstrings across the front bodice, no neck ruffle, and two tiers of skirt ruffles. Most of the extant gowns of this type seen are gathered front and back, have full gathered puff or double-puff sleeves, and most often have a neck ruffle. I love this gown because it’s simple, yet it’s also subtly ornate, elegant, and flattering.
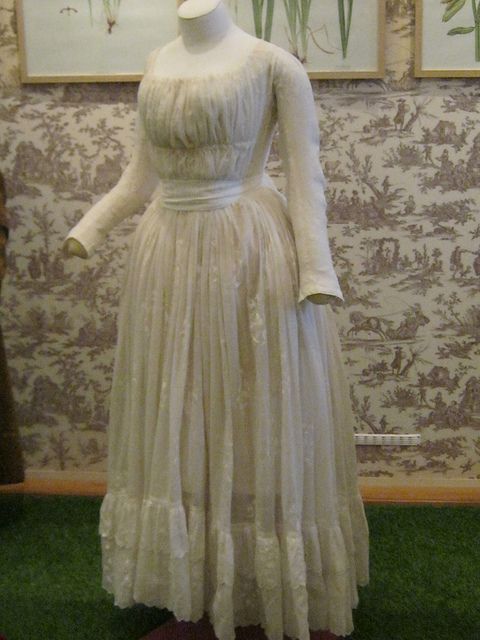
A gown held in the collection of the Musee de la Toile de Jouy in France, worn by Madame Oberkampf. This photo was nabbed from Pinterest, but the image at the original link doesn’t seem to exist anymore.
The fabric I’ve chosen from my stash was purchased from FabricMartFabrics.com a few years ago. It’s a wool gauze embroidered with viscose (or maybe it’s the other way around—the burn test was strangely inconclusive; so maybe the yarns are all blended), in cream. The embroidered design is VERY similar to that found on an extant early 1800s gown held in the collection of The Metropolitan Museum of Art in NYC. I have 5 yards of this 58-inch-wide fabric; it didn’t shrink much in washing, either. There probably won’t be enough fabric to include the original gown’s skirt ruffles, but we’ll see; it’s possible because of the fabric’s very wide width that I could get at least one ruffle out of it. If not, then a plain off-white to cream colored cotton gauze will have to do, or I’ll leave ruffles off altogether.
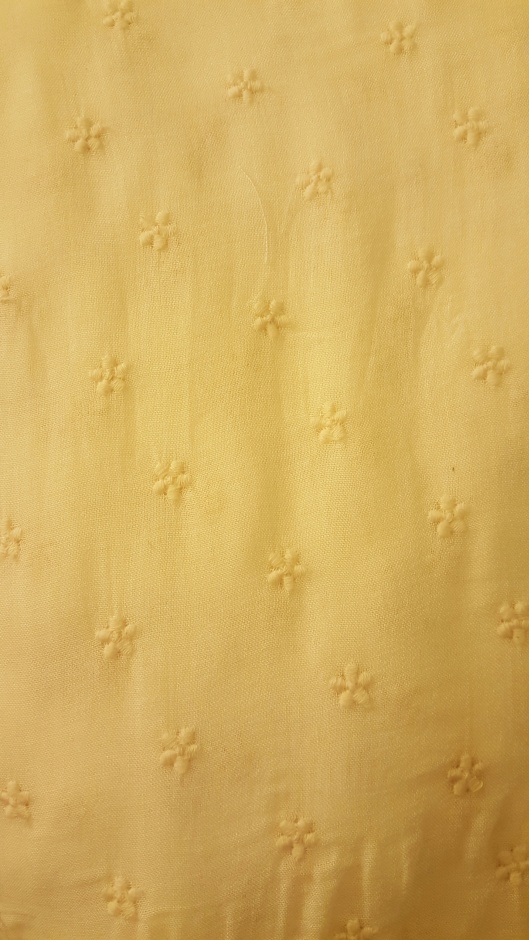
Embroidered wool/viscose gauze for the chemise a la Reine (or, a la Oberkampf!).
The pattern is the new robe en chemise/chemise a la Reine from Laughing Moon Mercantile. I’m thrilled that this company has put out this pattern, because all their other patterns are high quality and well done. A few changes to the pattern will have to be made to get it closer to the extant inspiration gown, but they’re very simple. I also may decide to use the armscye shape and two-piece long slim shaped sleeve that I made for my Regency gowns, depending on how I like the fit of the Laughing Moon slim sleeve. Another drawstring will need to be added to the bodice front under the bust, and I want to make the gown front opening rather than its designed back opening, for ease of dressing. Pleats or tucks instead of gathers will be made on the back bodice panel. And side slits for pocket access will have to be added.
Stays:
The stays are going to be the most difficult part of the whole ensemble. I’ve never made 18th century stays before, and this will also be the first time I’ve worked with a scaled pattern that I’ve had to grade up to something approximating my size. So far it’s looking like it’s in the right range, but I foresee lots of fine-tuning.
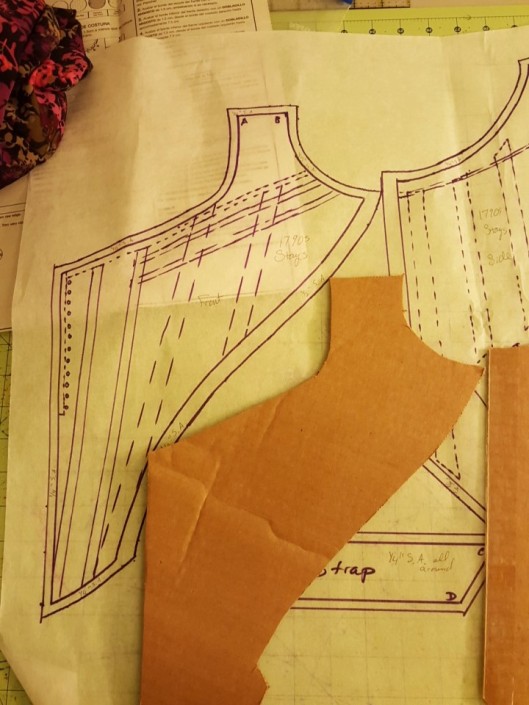
Scaled up stays pattern and cardboard mockup ready for testing.
I’m using the 1790s stays pattern from “Corsets and Crinolines” (page 44). Perhaps it’s a TAD late for chemise a la Reine, but it’ll do the trick and be somewhat easier to make, since it’s more lightly boned than earlier stays. Also, it’s very similar in style to those held in the collection of The Manchester Gallery in England, which were contemporary to that museum’s chemise gown, according to Sarah Lorraine of the blog Mode Historique. And since the straight, slim-sleeved versions of chemise a la Reine came along after the puff-sleeved chemise gowns, perhaps it’s not such a stretch. I don’t know. I do what I want.
It may be a bit more comfortable, too. And based on a few extant pairs I’ve come across, including the ones at Manchester Gallery shown on Sarah’s chemise gown blog, I’m going to leave off the pattern’s shoulder straps. Instead, the straps will be made from twill tape stitched to the underarm curve and up the side of the bust; they’ll loop over the shoulder, pass through a guide on the back of the stays, and cross at center back, then hook onto small hooks sewn on the front of the stays. This should give a far more flexible fit and a bit more mobility while wearing; and if the straps stretch, a new set of eyelets can be sewn to hook onto the hooks.
I’ve decided on linen outer and lining layers, with a cotton duck inner layer, and German plastic whalebone for the boning. It’ll be bound with cream-colored wool twill tape.
Petticoats:
The petticoats, under and outer, will be in the same side-opening wrap style that’s common for most 18th century gowns, providing access to the pockets underneath. I’ll be using one or more of the petticoat tutorials posted by costume bloggers I admire (Lauren of American Duchess, Katherine of The Fashionable Past, the ladies of A Fashionable Frolick), with reference to Sharon Burnston’s book “Fitting and Proper” and to Meredith Wright’s “Put on thy Beautiful Garments: Rural New England clothing 1783-1800.”
It took me a lot of thinking and shopping to decide what fabrics would be best for the under and outer petticoats. The under one should be somewhat stiff, and opaque. The outer one should be pretty, satiny if possible, and lighter weight, not so stiff. Oh I agonized. I didn’t want to buy anything new, as I’m trying to avoid new fabric purchases altogether this year.
Luckily, this past summer I bought some lovely cream colored, suit-weight linen from—of all places—JoAnn. I used the same stuff in black to make a dirndl and it is really nice to work with and decent quality. When I pulled it out of my stash I discovered I had purchased 4 yards, and it’s fairly wide, so there should be JUST enough for a petticoat. It’s quite weighty, with that awesome waxy/soapy surface feel heavier linen weights can have. I may have to use another fabric for the waistband, or maybe I’ll pop over to JoAnn with my latest coupon and buy one or two more yards, as I know they still have a bolt left.
I’ve also been hoarding a 5-yard cut of silk/cotton poplin that has a satin face (it’s Robert Kaufmann Radiance, if anyone’s interested, purchased from Fabric.com). I was saving it for a half-imagined Regency ballgown, but it’ll be perfect for the outer petticoat. I laid it under the cream gauze and the white really brightens the gown fabric’s appearance without looking all shiny and blazing white underneath. No, it isn’t historically accurate. But in this case, I don’t care; it works.
Shift:
I did have to purchase some handkerchief linen for a new shift, but that’s ok. I’ll be using the shift pattern from “Put on thy Beautiful Garments.” (Along with a shift, I’ll be wearing a pair of Regency drawers, newly made in very lightweight linen—totally NOT historically accurate for the 18th century, but anti-chafing needs outweigh historical accuracy in my book).
Pockets:
Standard. Some basic medium-weight linen from the stash and twill tape will be just fine, and there will be no embroidery.
Bum pad:
Although a chemise a la Reine had a somewhat natural skirt shape, and sometimes in portraits even appears limp, most paintings and fashion plates indicate some form of skirt support. A bum pad or false rump is necessary. Linen and fiberfill from the stash.
Shoes:
American Duchess Dunmores—I need to dye them! And break them in! I’m considering a few different colors at the moment, but leaning towards a deep berry or a blue-green shade.
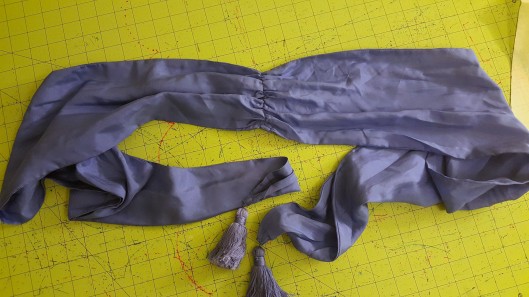
Sash:
My bluebell-colored silk habotai sash (with tassels!) from a Regency ensemble will work just fine for this. In fact, it’s probably more historically accurate for 18th century than for Regency.
Hat:
A high-crown, broad-brimmed straw hat from Jas. Townsend & Co has arrived, along with several ostrich feathers. Some of the feathers are all-white, while others are variegated white and buff, which I really love. I thought about dyeing them, but most portraits of ladies wearing chemise gowns from this period—and other styles, too—with hats that have feathers seem to have plain white feathers. Why ruin the natural beauty of the feather, after all? But I will try to curl and possibly combine a few into one plume for extra fluffiness.
So, there it is. I’m already hard at work putting together the various elements for my 18th century Chemise a la Reine ensemble. Updates will be posted as the project progresses!
